How to Configure Domain to Cloudflare

Cloudflare could be a CDN (content delivery network), it permits individuals around the world to look at your website info quicker. It places your website's knowledge on multiple servers around the world, In this fashion once somebody tries to access your website they're connected to the highest supply of information, reducing load times for purchasers. For a lot of in-depth info on the services they supply you'll be able to explore Cloudflare. Here are the necessary steps:-
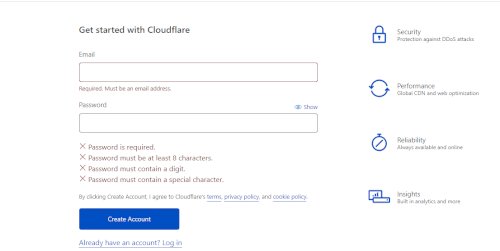
STEP 1. Create an account. Go to this link https://dash.cloudflare.com/sign-up. Enter your Email/Password & create an account.
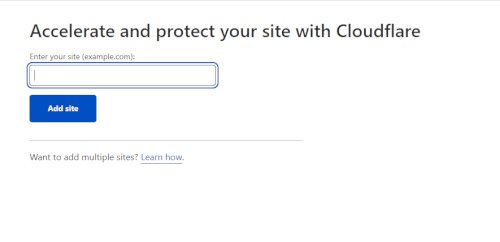
STEP 2. Enter your domain name then click on Add Site.
STEP 3. At the ensuing step opt for your arrangement. We'd advocate the Free arrange which provides you everything you would like to urge basic SSL up and running. You'll review their plans here https://www.cloudflare.com/plans/.

We recommend you select the free plan & click on CONTINUE
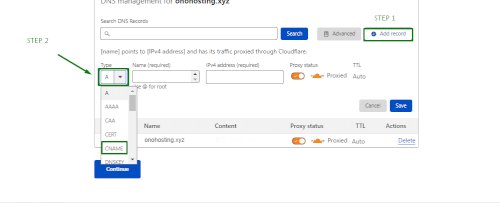
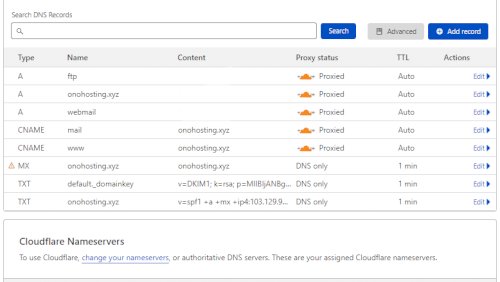
STEP 4. Add DNS records (A, TXT, MX, CNAME).

STEP 5. Click on A record & put your hosting account IP or shared hosting IP. If you don't know your hosting IP then you may ask your hosting provider for the same.
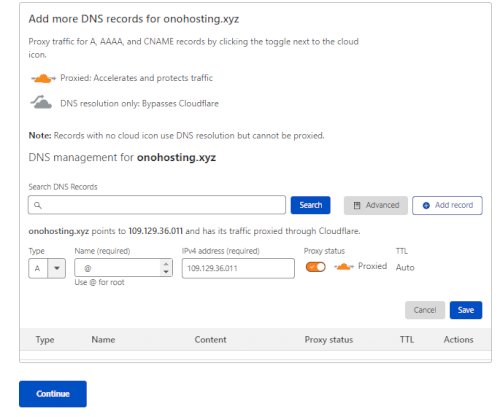
Name:- @
Ipv4 address:- put your hosting IP address
Now, Click on save.
(If you are using Cpanel then login to your Cpanel >> Go to ZONE EDITOR. Click on manage. All the records are available there).
For CNAME / TXT / MX Records, Select Type (Mentioned on the above screenshots.
STEP 6. Now Click on CONTINUE & New window will open with the nameserver's details.
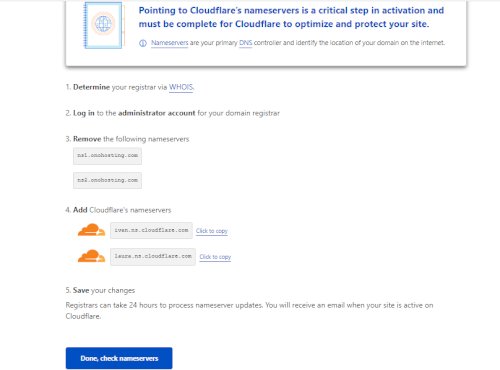
In these steps, you have to change your domain nameservers provided by Cloudflare to your Domain account.
If you are an Onohosting user then follow these steps:-
1. log in to your Onohosting account. https://onohosting.com/core/clientarea.php
2. Go to my Domain section. Find the attachments for the above steps.
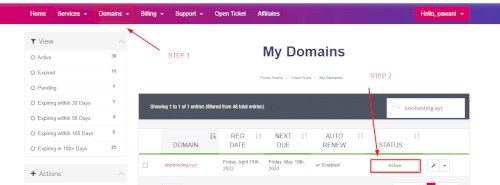
3. Check the right Sidebar & click on NAMESERVERS
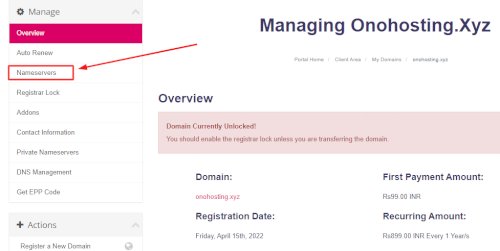
4. Now remove exiting nameservers & put Cloudflare nameservers generated for your domain on the CLOUDFLARE account.
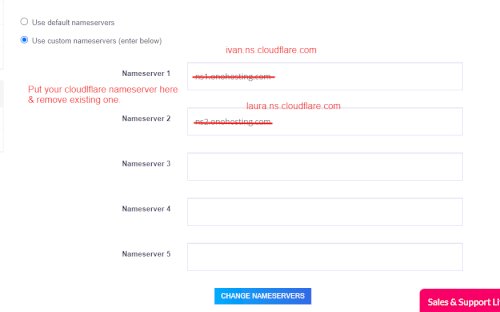
Click, CHANGE NAMESERVERS.
Congrats, You have successfully configured your domain to Cloudflare.
NOTE:- Domain takes a maximum of 24 hours to connect with the server or resolve globally. You will receive a mail notification whenever your domain is active on Cloudflare.