Create your own website using drag and drop website builder without coding
Create your own website using drag and drop website building without using single line of code.

There are so many ways, user can create a website & the best part is that user need not required to learn a single line of code for making website. Onohosting's every plans comes with drag and drop website builder i.e "SitePad Website Builder".
Our this tutorial will cover the basics of setting up a new website up and running in no time with SitePad Website Builder.
What Is SitePad Website Builder?
SitePad builder is a drag and drop website building plugins or web applications. SitePad can creates new website with a few clicks. SitePad tools is very much efficient for that person that requires simple one or mutil-page website.Sitepad comes with 699+ ready to use templates.
How to Install and Set Up SitePad with Onohosting
Step 1: Login in to cPanel Control Panel
- Log In to Onohosting Client Area & My Service => Click On Active Services => Login to cPanel OR
- cPanel's URL will be https://domain.com:2083) and login with your Username and Password details.
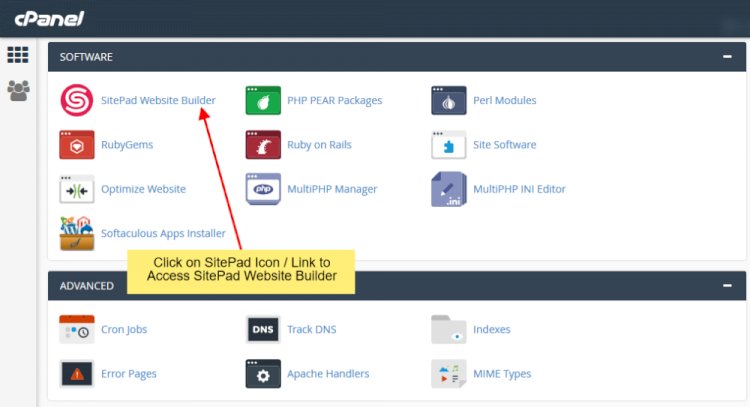
Step 2: After Login to cPanel, Look for SitePad Builder.
Step 3: After click on SitePad Builder, user will be redirected to SitePad Manager. And Once user are redirected to SitePad Manager. User need to click on create a new site.

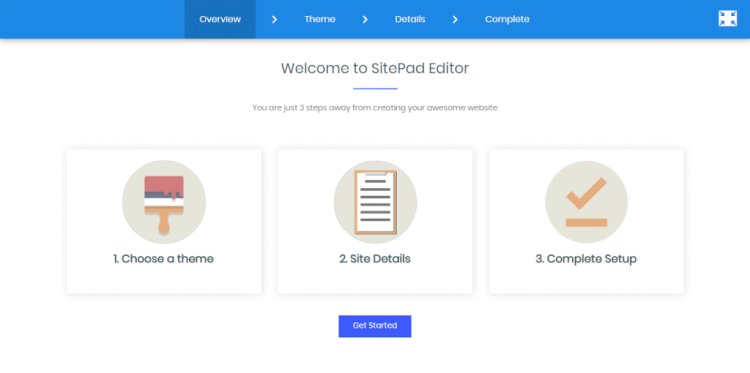
Step 4: After click on create a new site, You will need to complete the setup process to set up your site & welcome page of SietPad editor will come. Click on the "Get Started" button to proceed to the next level.
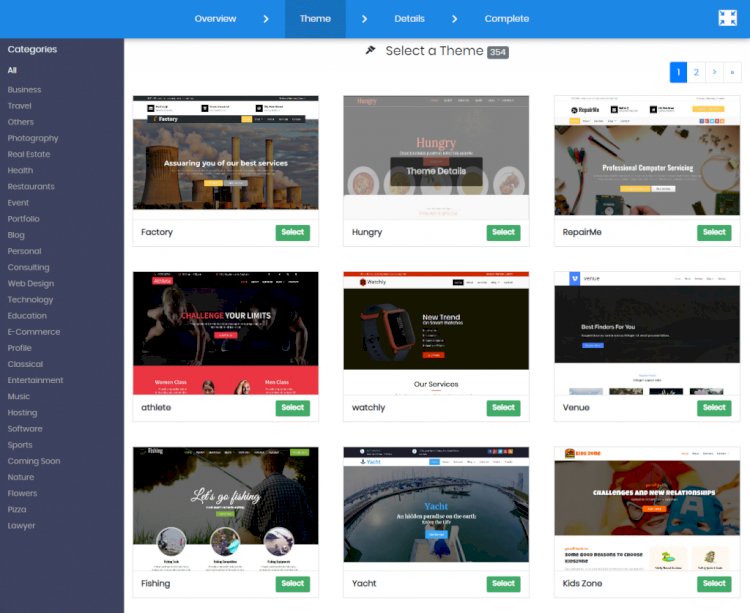
Step 5: Now user need to select or choose a theme for their website. User can also search for a Theme through theme Search options. Once user get the suitable theme for their website, user can click on the "Select Button" to set the theme as a "Default Theme" for their Website Editing.
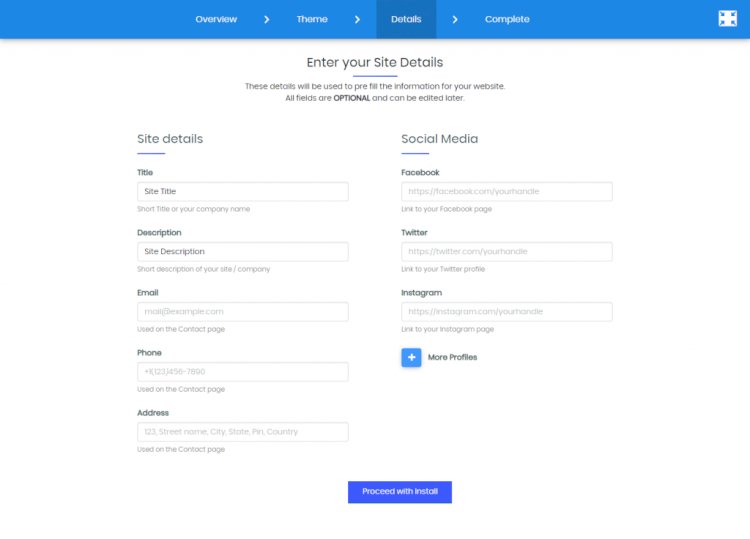
Step 6: After selecting correct theme, user will be redirected to the detailslevel, where user need to fill the website details, all these filled details will be replaced with the dummy details of that selected theme . After filling all these details user need to click on the "Proceed With Install" button to proceed Final Steps.
Step 7: After Clicking on "Proceed With Install" button, user will get below result "Setup Complete" . Here user will get to options :
- Click here to login into the site start editing : if you click on this options user will reditected to editing section of pages, content, text, images and almost everyting user can edit.
- 2nd link will reditect, user to preview or view their website after all setup.
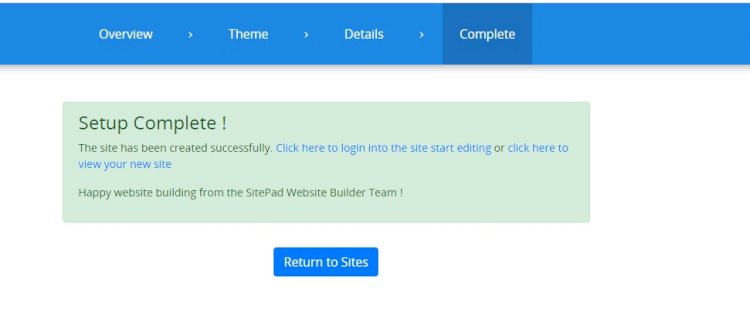
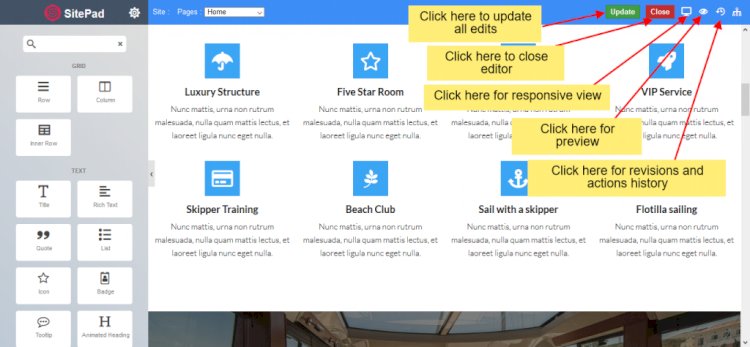
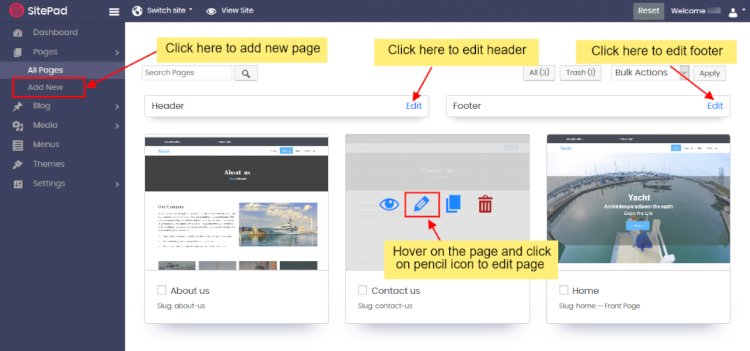
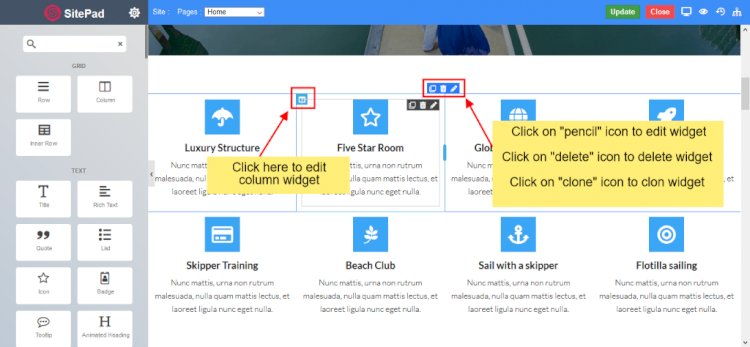
Step 8: We suggest user to open both link in seperate tab, so that user can reach both url. If user choose 1st options "Click here to login into the site start editing". User will reach below & user can now add new pages or Edit pages of their website. Click on Pages option to Select "Add Page" or "All Pages". When you select All Pages you can see certain options such as Edit Page, Delete Page, View Page, etc.

Menu Functions Explanation: Click on Pages option to Select "Add Page" or "All Pages". When user select All Pages user can see lot of options such as Edit Page, Delete Page, View Page, Edit Header( Top part of a website), Edit Footer ( End part of a website) etc.
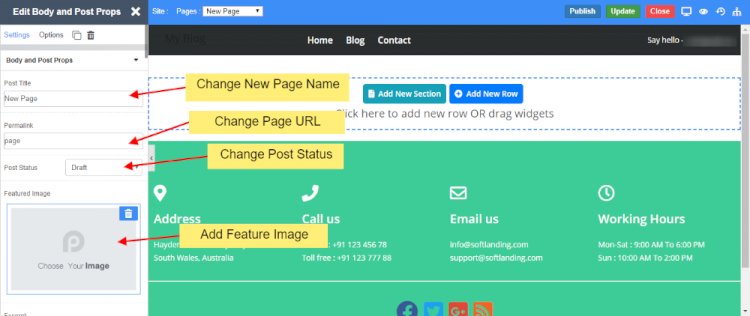
Menu Functions Explanation: If yser select to Add New Page or Edit Page option. Then user will be redirected to Edit Page where you can Edit Page. If user select to Add new Page the page title will be New Page and Page URL will be Page and Post Status will be draft. You can change all the (like Page name and URL ) as per your wish and to publish your post, you need to change the status of the post from the draft. By default, the new page gets Added on the Menu Bar once you update the Menu Name changes to that of the Page Title.
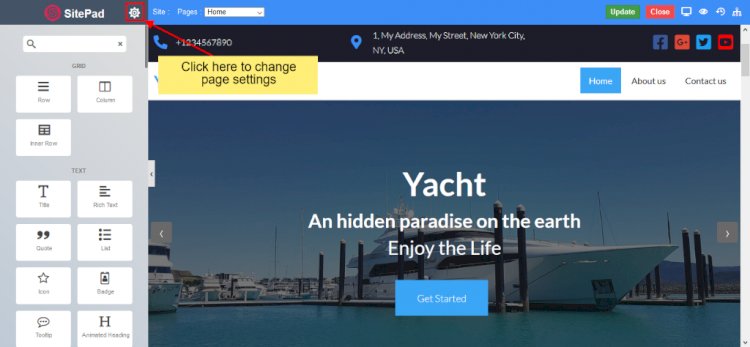
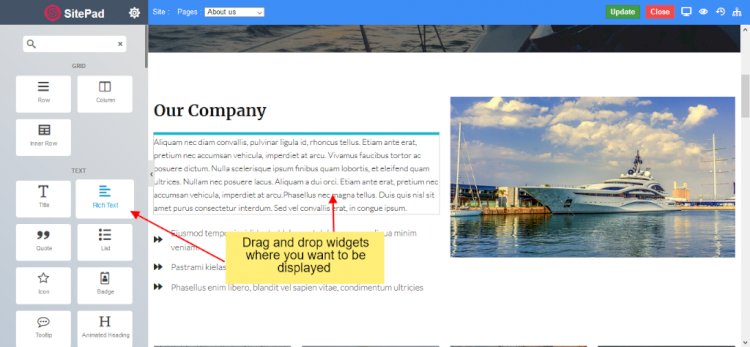
Menu Functions Explanation: User can also drag and drop different Widgets where ever user want to place that elements. There are so many different "Widgets" like Title, Paragraph, Slider, Service Box, Rich Text, Images, Videos, etc.
Menu Functions Explanation: After user Finish Editing their work user can click on the Update button, now all your work will be updated and saved successfully.